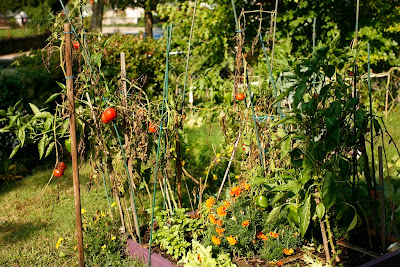
The gorgeous, almost violent bloom and harvest of this past growing season can't go on forever, and though I plan to try my hand at cold-frame crops over the winter, the time has come to prepare for the season ahead.
So I made a list . . .
 . . .and then ignored the list because 'turning compost' was #1 and I didn't want to do it.
So onto the tomatoes, which had to go.
 First, I had to disentangle them from the nine-zillion green twisty ties that secured them to innumerable bamboo posts:
 I salvaged what ripe tomatoes I could before sending the rest to the wheelbarrow, but most of them were destined for the compost bin.
 Here's the bed after I removed the tomato plants:
 Ideally, I would immediately enrich the beds with finished compost, but when I went to check and turn the compost, I found it to be mid-cook and nowhere near finished. That is to say, it was very stinky and steamy. I don't think it comes through very well in this picture, but you can see some steam rising where I lifted a layer with the pitchfork:
 (it's not easy to stir and photograph compost simultaneously.
The other composter was further along. I knew this for several reasons. First, the volume had halved (several weeks ago, it was completely full). Second, it didn't reek. And third, it was much cooler. But it has a way to go because some of its components are still recognizable.
 I'm about to sound like an expert here, but in fact, I have no idea what I'm doing - this is all the result of a little research.)
After a season's worth a growth, it's a good idea to do something restorative for the soil (in addition to enriching with finished compost at some point). Farmers will often plant a crop that fixes the nitrogen in the soil into a more crop-friendly form and then acts as a "green manure" when it's tilled under and decomposes. Many plants in the legume family are good for this (such as buckwheat).
I had a couple to choose from (thank you, Mom), but I decided on the one that sounds like medicine you'd give a cat with indigestion: "hairy vetch."
The seeds of hairy vetch are small and round, like shrunken, smooth peppercorns. I dug up the squares where the tomatoes had been and planted several sprinklings of the seeds. I have no idea what to expect, but we'll see what happens.
While I was poking around in there, I came across a beautiful snail doing some serious damage to the pepper plants:
 He was relocated to the hydrangea bush.
The final thing on my list was the chives - they were out of control. So I chopped them all down and decided to give a go at drying them in the oven (despite the firm warnings on numerous websites about how they will lose their flavor).
Chopped them up, spread them on some cookie sheets and stuck them in the oven on the lowest setting:
 I had too many chives to dry in the oven, and I've always wanted to try chive scones, so I decided to try out a (half-made up) recipe:
Don't preheat the oven (I'll explain why later).
sift together:
- 1 1/2 cups white flour
- 2 tsps baking powder
- 1/2 tsp salt
blend with (I used a food processor)
- 3 tbps butter
- 1/2 cup (or more) fresh chives
- Put flour mixture in bowl and make a well in the middle.
- Pour in a little more than 1/2 cup milk, but you want to use as little as you can get away with so the scones will be more flaky than chewy.
- Cut in the milk with a knife, and combine just to the point where it all hangs together. Over-working the pastry dough will make it tough.
- Turn it onto a floured surface, and roll it out to about 1" thick. Cut the scones out (I used a cookie cutter because I didn't have anything else) and place on an ungreased cookie sheet.
- I used an egg wash made of an egg white and a touch of milk, whisked together with a fork. Brush it over the scones.
- Sprinkle lightly with fresh-ground pepper and a touch of coarse salt.
Now for the confusing oven part:
I recipe I was using for reference suggested putting the oven at 220 degrees, but after a minute or two, I decided that would be entirely too low a temperature, and cranked it to 405 and eventually to 430 degrees. So next time, I think I would just put them in a cold oven and set it to 405 degrees, so it could rise and bake a bit before reaching full temperature. After it reaches 405, turn it up to 430 so the tops brown a little. Once the tops are golden, they should be done, and it shouldn't take more than 20 minutes, tops.
Here they are (er, were, before Erik ate them all):
 He calls them "grass cookies." So I guess that's what they are!


5 comments:
Hello
I really liked your snail picture, Veggie predators usually get turned into chicken snacks around here. I would also like to say that reading your blog along with another one has inspired me and my girlfriend to have a go at this blogging thing. Feel free to stop by if you get a chance. http://waldeneffect.org
mark
Mark,
I just checked out your blog - wow!! You are living the dream, man! But I bet the dream involves a ton of digging and hauling or every sort of dirt imaginable. I am really impressed that you and Anna took on an over-grown farm and are working your tails off to live your values. I will certainly check your blog often - for inspiration!
Best,
Dina
Dina, I got your email this morning and wandered back to see what Mark had commented on your blog. Couldn't help laughing when I saw he said exactly what I would have said about the chicken snacks. :-)
I adore turning compost --- funny to see that you don't like it. But I just keep mine in a big pile, so it's easy to spade it over into another pile, turning the outside in. Your second photo looked a bit wet, but could have been the photo...
Anyway, thanks for checking us out! I've added a link to you on our blog --- thanks for linking to us!
(Mark's from Xenia. My mom's actually from Massachusetts (South Weymouth), so I guess we've got a lot of connections!)
Hi, Anna;
Xenia, Ohio - yes indeed, I've been there many times. And I've had to cover a lot of stories in South Weymouth over the years, too! Small world.
Turning compost - it's a love/hate thing. I love the process of compost, and when it steams, I get silly happy. The only downside is that due to the fact that we have neighbors who may/would object to a more back-friendly open-pit style compost pile, we're constrained to closed systems. The method we're using now are these city-subsidized "earth machines." I can't really recommend them, because they're a bear to stir (unless you're my husband and have the musculature for it).
And I've been sick, so heaving my way though that pile did not sound like any fun.
Also, how perceptive! The back pile is indeed too wet. I need more "browns" and I have a super-abundance of greens. I think when we have chickens and regularly compost the straw+chicken droppings, that will help aerate things immensely. For now, all the yard waste we have in any bulk are pine needles, which are definitely not "browns."
I'm happy to make your cyber-acquaintance!
Best,
Dina
We're so lucky to live out here where no one cares what our compost pile looks like. Mine's just a couple of mounds of stuff, which makes it easy to turn.
I'm sorry you've been sick --- I hope you feel better soon!
Post a Comment